Welcome back to our How to Draw for Kids series! In this tutorial, we’ll learn how to draw a vibrant parrot using basic shapes and easy-to-follow steps. All you need is a pencil, an eraser, some paper, and optional coloring supplies like crayons or markers.
A printable PDF of this tutorial is available below, perfect for screen-free drawing sessions.
Begin by sketching an oval shape near the top of your paper. This will be the parrot’s head.
Step 2:
Below the head, draw a larger oval that overlaps slightly with the head circle. This will form the parrot’s body.
Step 3:
Draw smooth lines connecting the head and body to form the neck and outline of the parrot. Erase any overlapping lines inside the connected shapes to create a seamless outline.
Step 4:
On the side of the body, draw a curved shape for the wing. Then, add a curved beak extending from the front of the head.
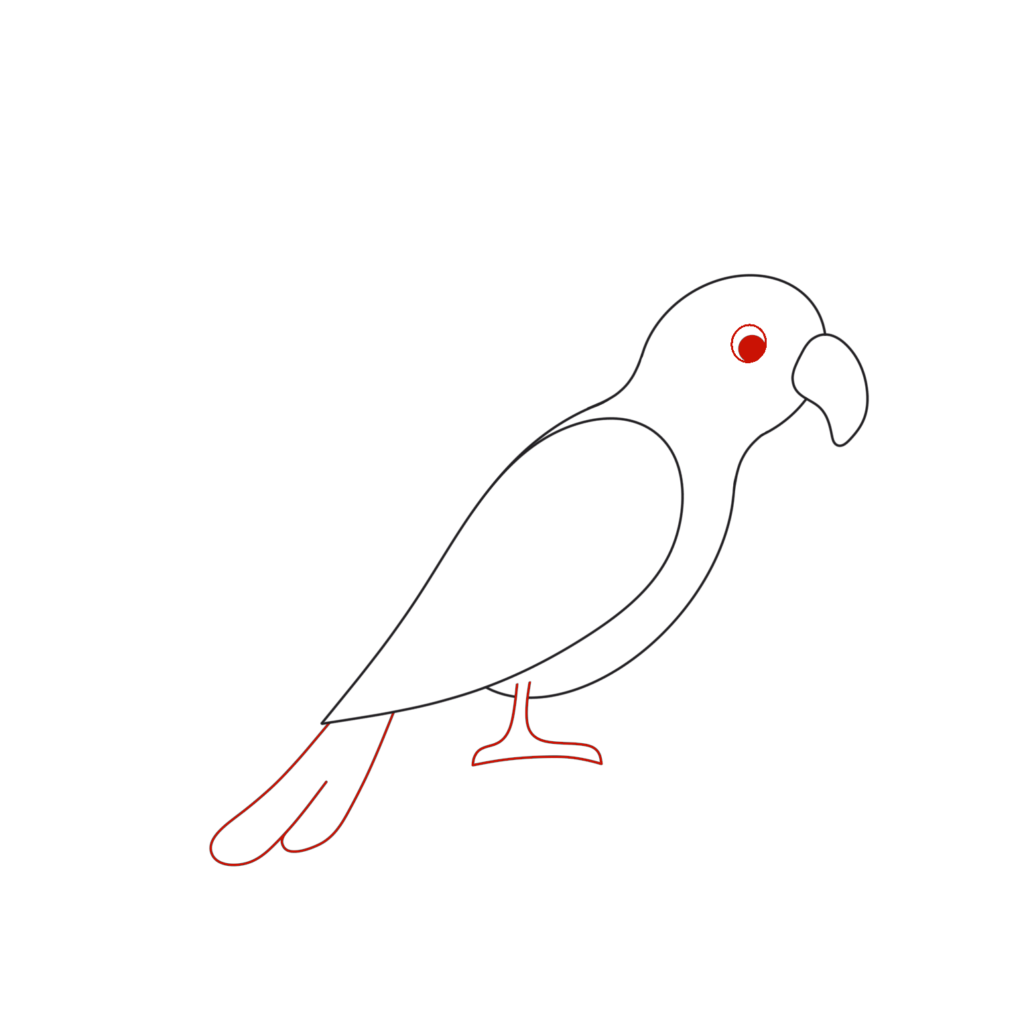
Step 5:
Inside the head, draw a small circle for the eye. At the bottom of the body, sketch long, pointed tail feathers. Add a leg extending from the body.
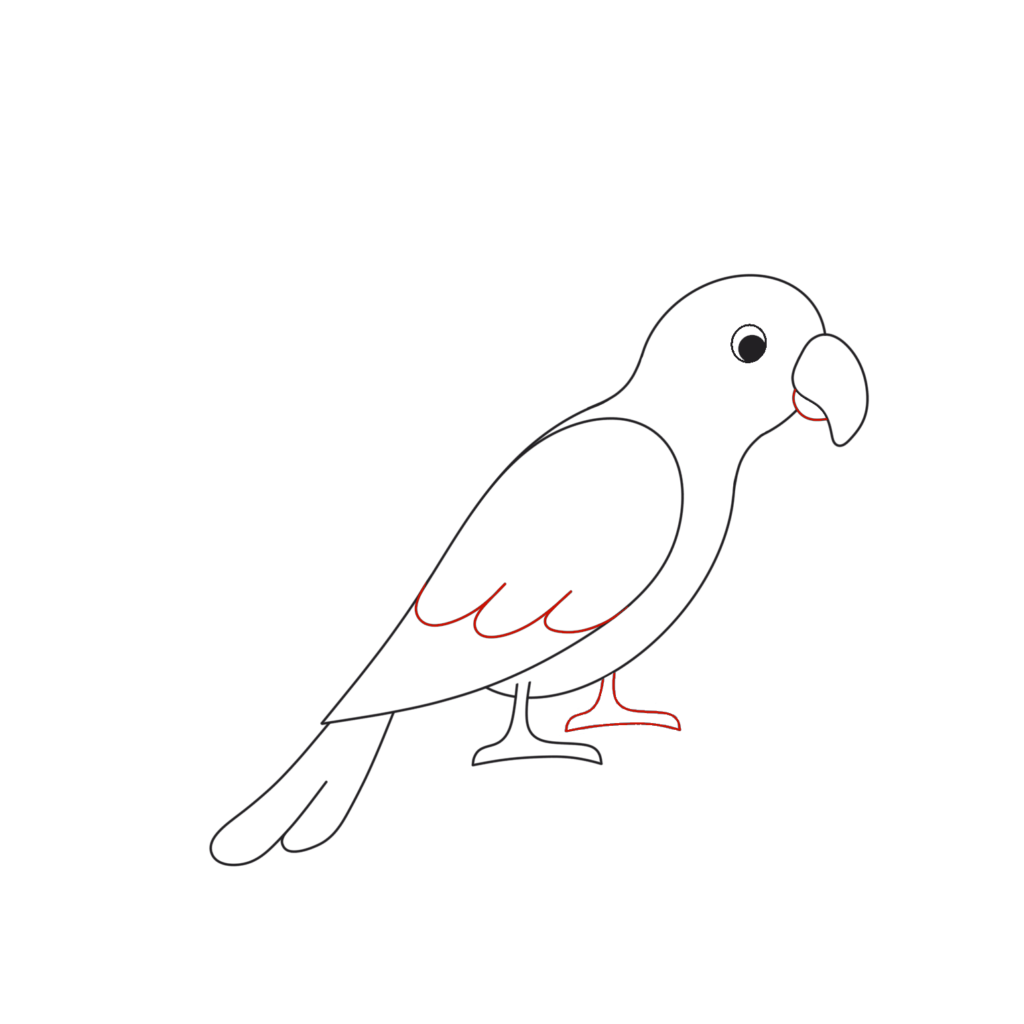
Step 6:
Draw the second leg slightly behind the first to show depth. Add the lower part of the beak beneath the upper curve. Finally, add details to the wing to represent feathers.
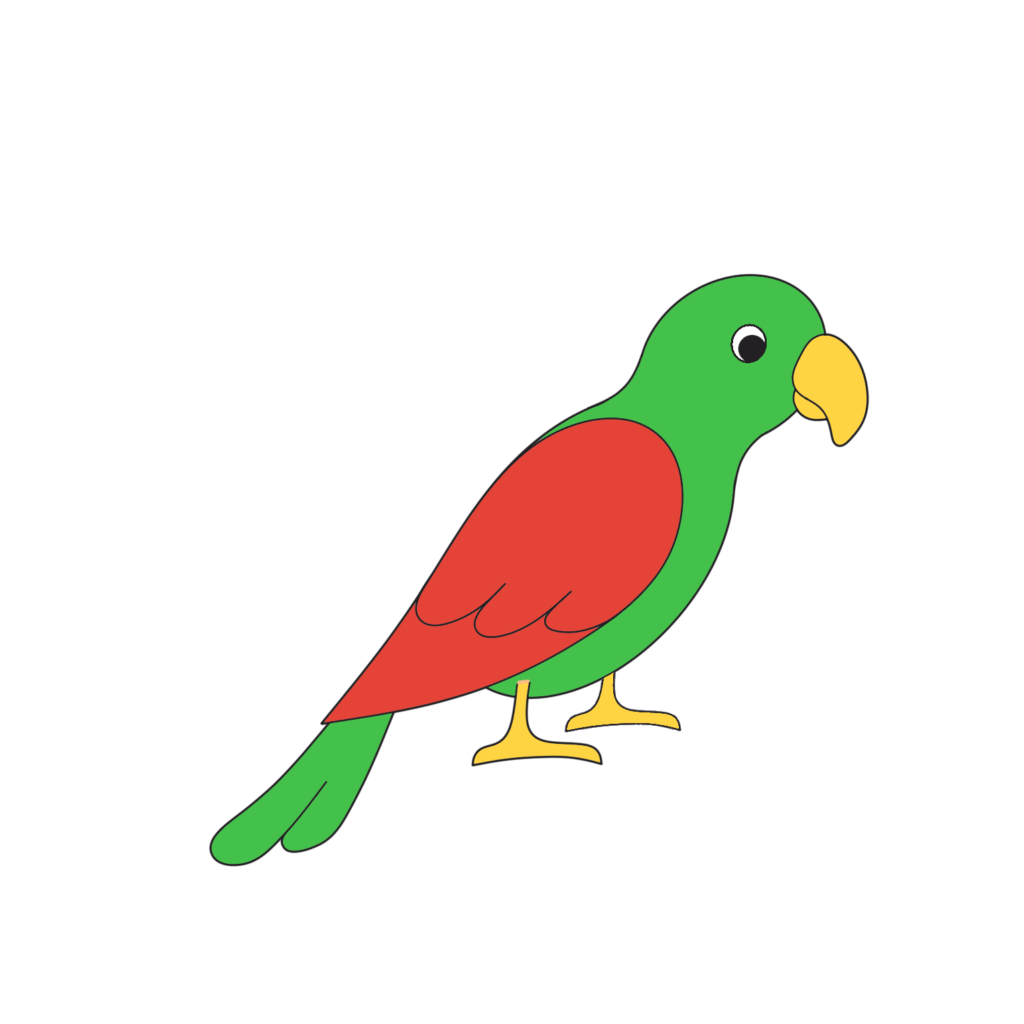
Once your parrot is outlined, it’s time to bring it to life with color! Parrots are known for their bright and varied colors, so feel free to use a mix of reds, blues, greens, and yellows. Remember, the goal is to have fun and express your creativity!
If your child enjoys these step-by-step tutorials, we highly recommend the book:
It’s packed with fun and easy drawings that kids can follow, and it covers everything from animals to silly snacks. A perfect next step for nurturing creativity at home.
And don’t forget to check out our own books too – full of fun puzzles, jokes, and learning activities your kids will love!